Getting Started with this+that
A tool you have signed up for but never set up does nothing for you, and the stretch between those two states is where a lot of trials stop. This guide gets you across it. this+that reads everything that lands in your inbox and chats, pulls out the real work, and handles the busywork on its own; the steps below take you from an empty account to a working one, screen by screen. You will not need to write any code.
There are two paths through it. Pick the one that fits:
- Just you? Follow “Set up this+that for yourself” below. It is three short steps and takes about fifteen minutes.
- Setting up for a team? Do the personal setup first anyway, because you will run the product yourself before you roll it out. Then work through “Set up this+that for your team” to prepare the shared pieces and invite everyone in.
Your data, and who can see it
Connecting your inbox and chat to a new tool is worth considering carefully, so here is exactly what happens to your data. The full detail, including our Data Processing Addendum, lives on the security page.
- You connect your inboxes through OAuth. When you connect Gmail, Outlook, Slack, Microsoft Teams, and Google Chat, or another source, you authorize through that service’s own OAuth screen, so we never see or store the password to those accounts. You can disconnect any source whenever you want. (You can sign in to this+that via OAuth with Google or Microsoft, or with an email and password.)
- You can turn on two-factor authentication. Add an authenticator app to your account for a second factor at sign-in, so a password alone is not enough to get in. If you sign in with Google or Microsoft, whatever two-factor rules your organization enforces there carry through to this+that.
- Everything is encrypted, and employee access is the exception. Your messages, tasks, brain pages, calendar, and contacts are encrypted in transit and at rest, under dedicated KMS keys that only the application’s service roles can use to decrypt. Our app and AI services decrypt content automatically to answer your requests, but employees read it only with your permission or for emergency support, and that access is temporary, logged, and available to you on request.
- The AI runs inside AWS, and your data never trains a shared model. Reading your messages to pull out tasks happens through Amazon Bedrock, AWS’s managed AI service, entirely inside AWS. Your messages are not used to train AI models: not by us, and not by our model providers, who process messages under enterprise contracts that prohibit training on our data. We do use your own data to personalize results inside your account, but that stays in your account and is never used to train a model that serves anyone else.
- You stay in control. Disconnect an integration and we stop syncing new messages from it. Close your account and every message, task, and record we hold for you is removed. We keep your contact details for 24 months so we can tell you about changes; email support@thisandthat.chat to have them removed.
For IT and compliance: we host on AWS, our SOC 2 Type I examination is complete as of July 31, 2026 and our Type II audit is underway, and we follow GDPR, UK GDPR, and CCPA. Our Data Processing Addendum, with GDPR Article 28 terms, the EU Standard Contractual Clauses, and the UK International Data Transfer Addendum, is available on request. The security page and DPA have the specifics, and you can check live system status and past incidents at status.thisandthat.chat.
Set up this+that for yourself
Step 1: Create your account and finish onboarding
Go to the sign-up page and choose Create your account. You are starting a free trial, and there is no credit card needed. The fastest way in is Google or Microsoft; both sign you in with one click. If you would rather use a work email directly, choose More sign-up options and fill in your first name, last name, job title, email, and a password, then choose Sign up. Accept the terms in the modal, and enter the 6-digit PIN we email you to confirm the address.
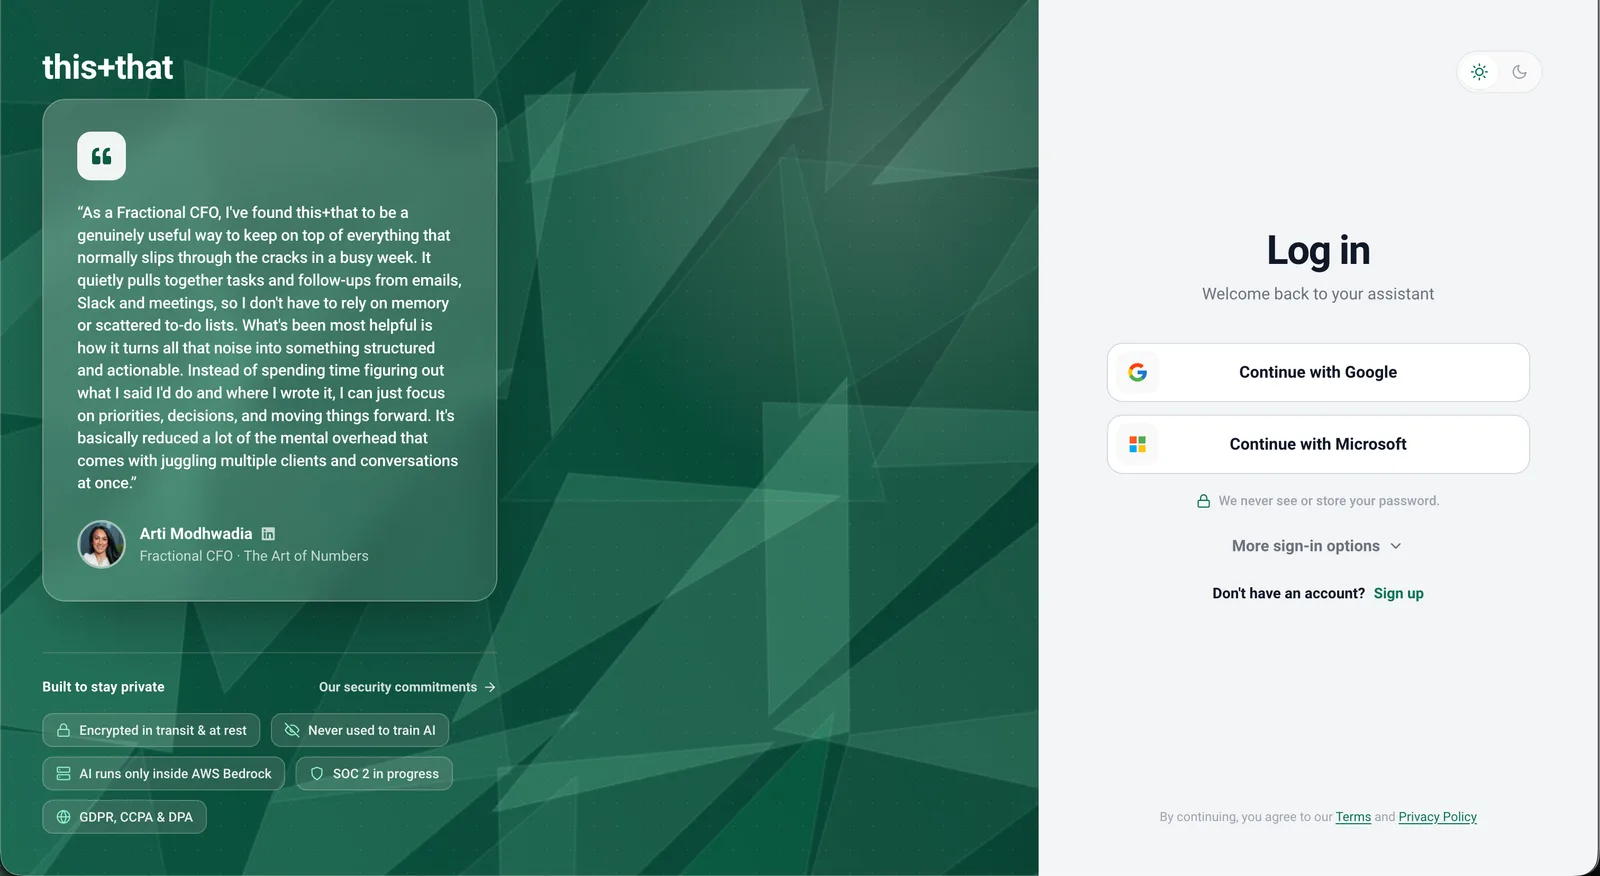 You can sign in with Google or Microsoft, or with an email and password. New to this+that? Choose “Sign up” to create your account.
Once your account is created, onboarding starts automatically. The header tracks where you are as Step X of Y. The welcome screen plays a short animated intro (“Welcome to this+that”, “Same brain. Same page.”); choose Get started to begin.
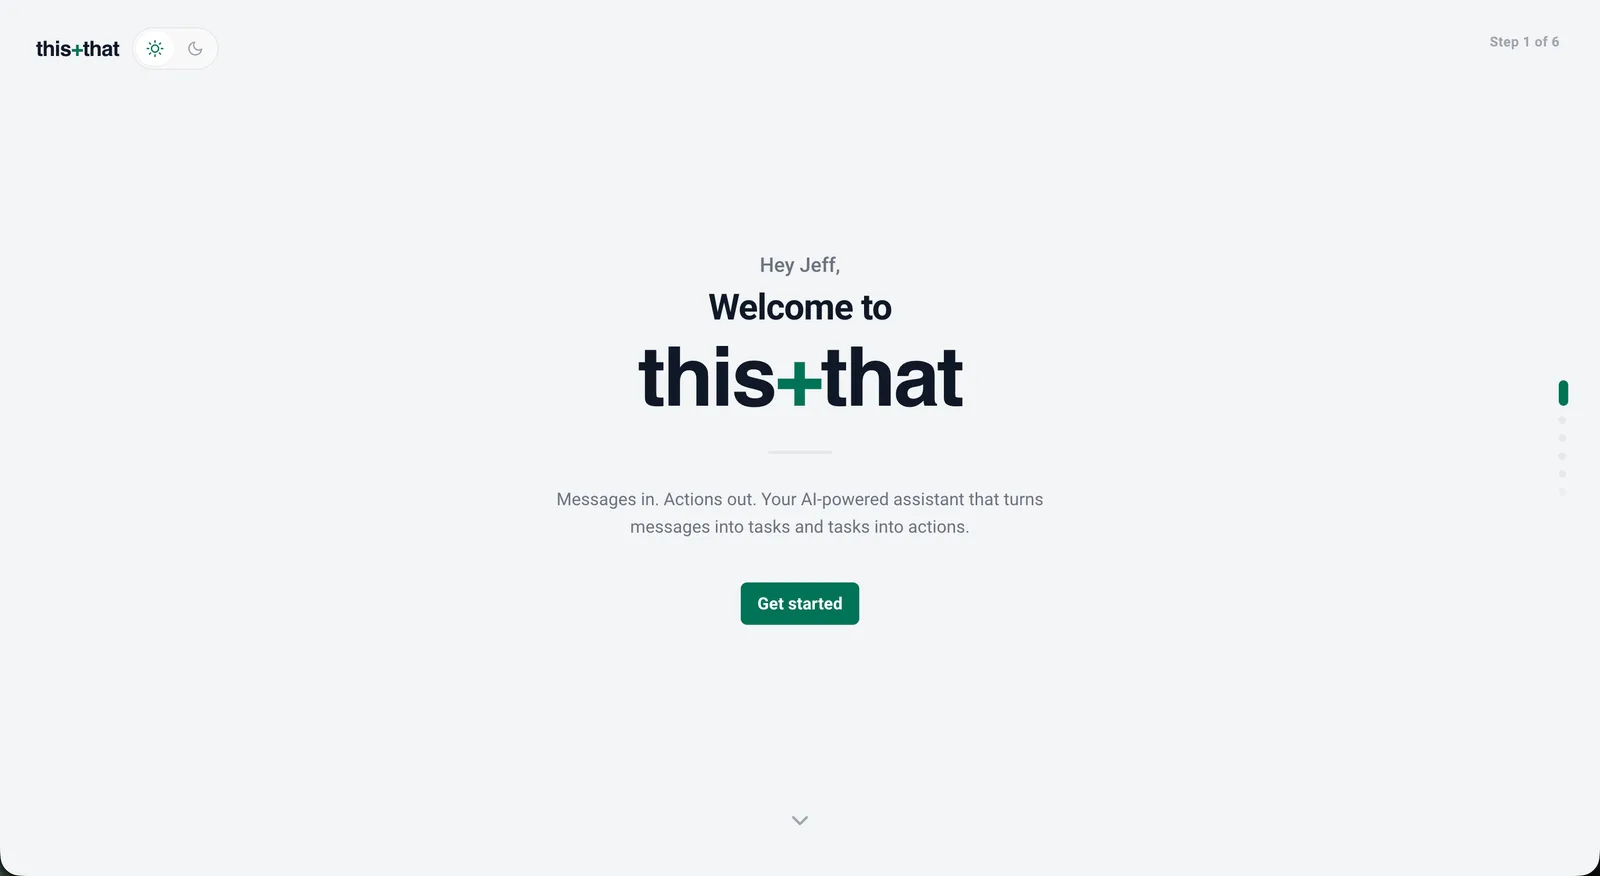 The first onboarding step is a quick welcome before you connect anything.
The key onboarding screen, It all starts by connecting your email, is where you link your inbox. Connecting Gmail or Outlook through the OAuth prompt is the recommended first step. You can also connect Slack here if you use it; it is optional at this stage. Choose Continue when your email is linked. this+that then shows Discover flows, where you can browse templates for commonly used workflows, and runs an email-sync step (“Setting up your DoBox”) with a progress animation. When it finishes, you land in your DoBox, the task list that fills itself from your messages.
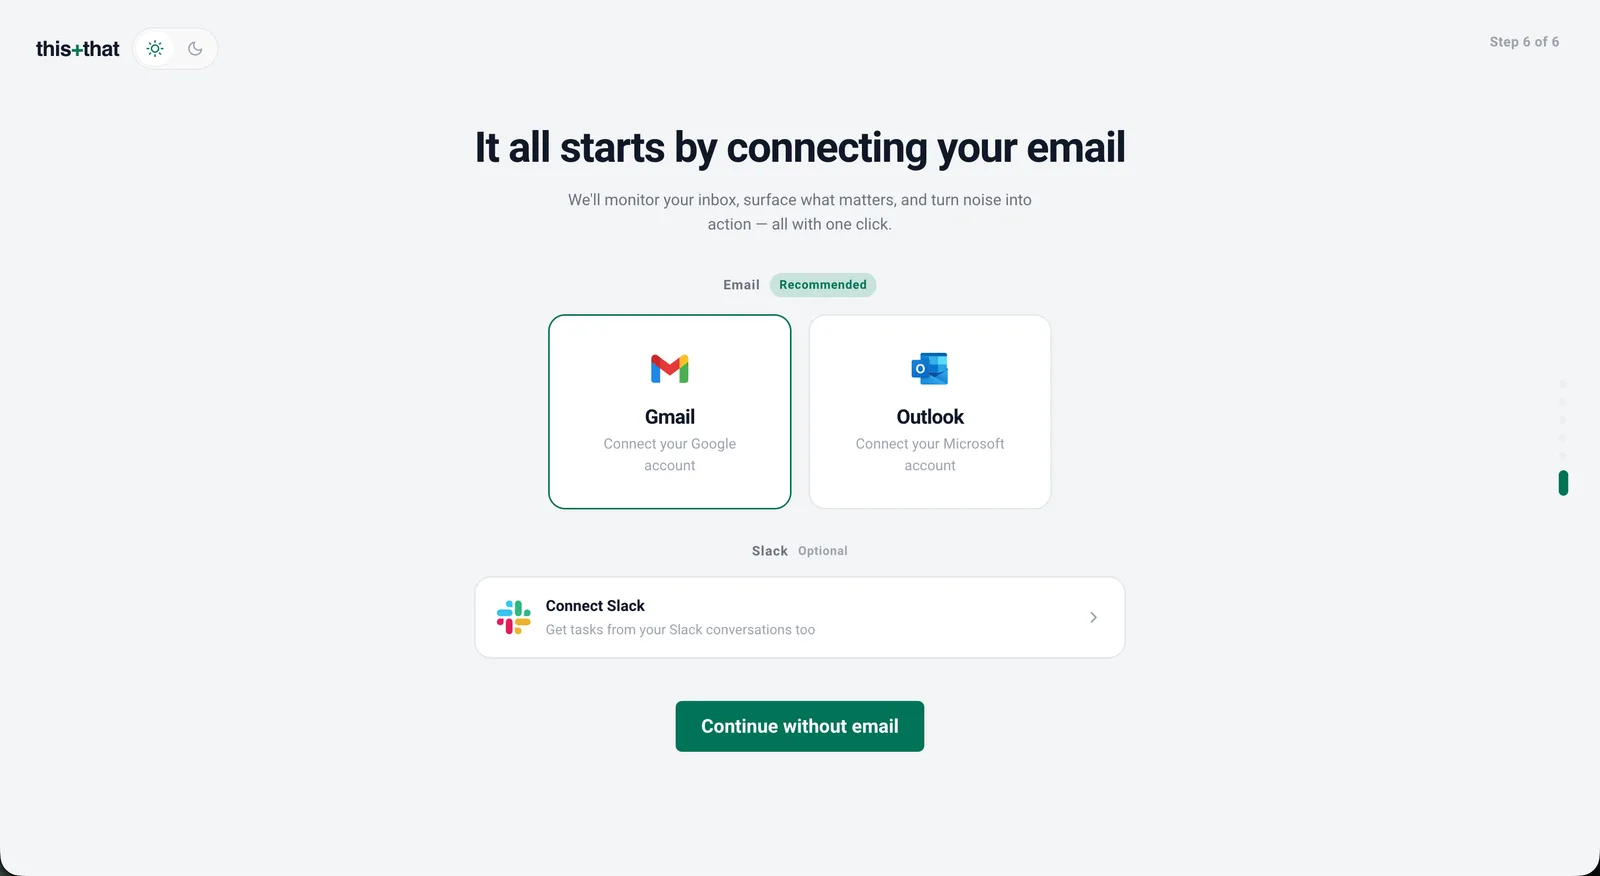 Onboarding starts by connecting your email. Gmail and Outlook are the recommended first step; Slack is optional and can be added later.
Step 2: Connect your accounts and channels
Onboarding connects one email account. To add the rest of the places your work lives, open Integrations in the sidebar. Each service shows a Connect accounts or Integrate button and a Connected or Not connected tag. Use Add account to link more than one login for the same service, and Manage accounts to review what is connected.
Work through the Setting up analysis section, which covers the channels this+that reads: Gmail, Outlook, Slack, Microsoft Teams, and Google Chat (connect Google before Google Chat). Connect whichever ones you use. The more channels you add, the more complete your DoBox and your Brain become.
Telegram sits apart from that list. We do not read your Telegram account into the inbox. The Telegram entry connects the this+that bot so you can message your assistant from your phone, covered under Go further below.
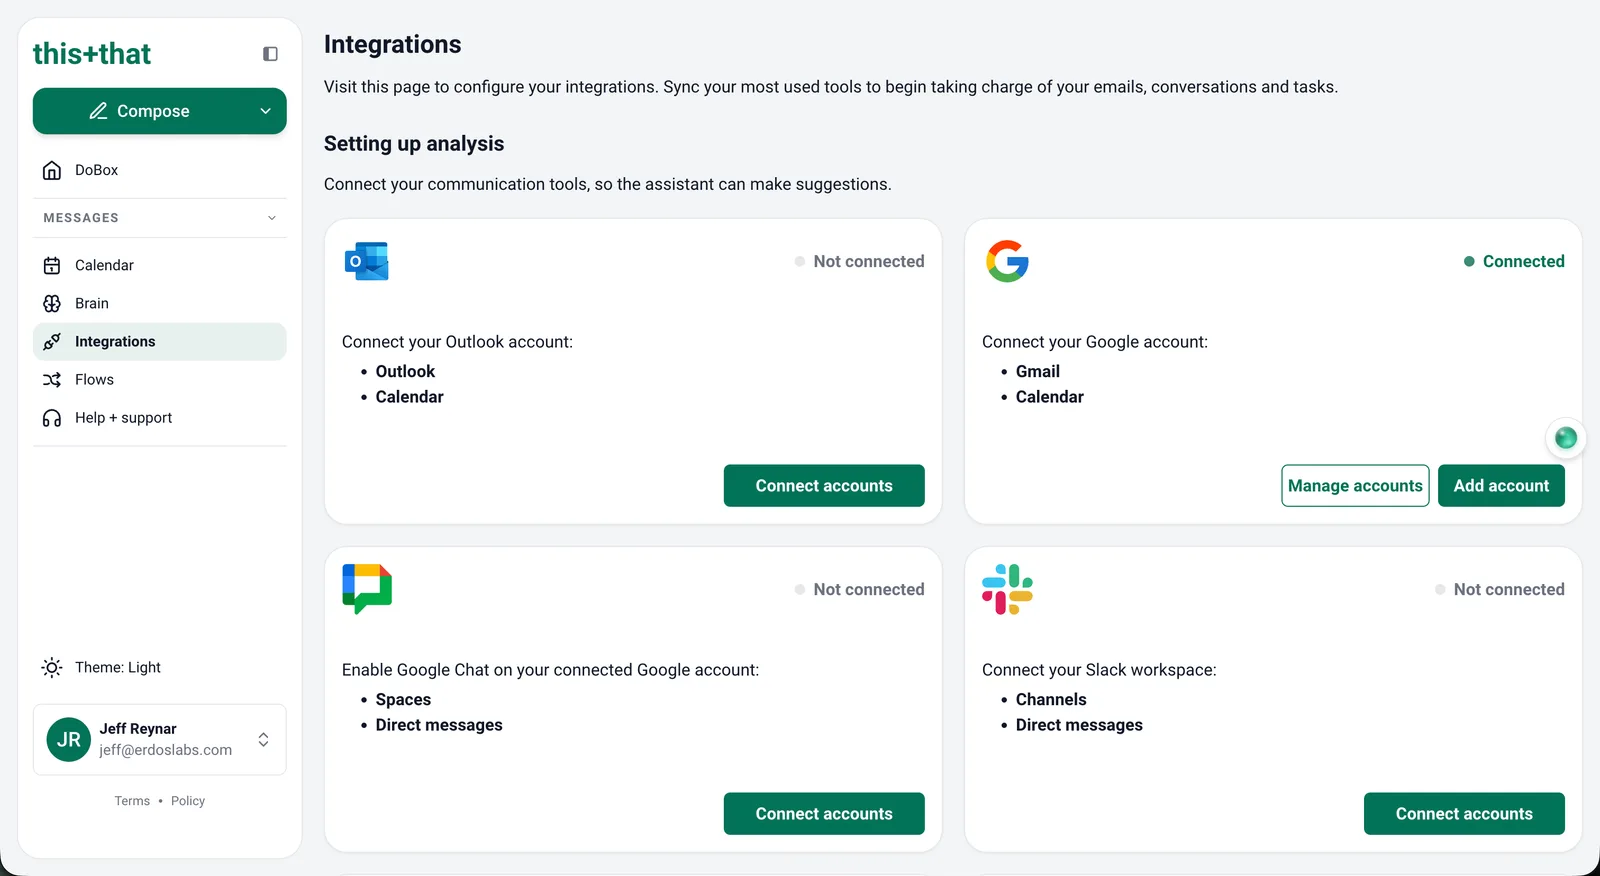 The Integrations page. The “Setting up analysis” section is where you connect your communication tools; connected accounts show a green “Connected” tag.
Step 3: Turn on a few prebuilt workflows
Flows are the payoff. In the sidebar, open Flows and switch to the Discover tab, which is the template gallery. Templates are grouped into categories: Email boosters, DoBox & Tasks boosters, Slack boosters, Daily summaries, and Workflows. Search the list, or use the Flow Generator at the top: type what you want to automate in plain words and it drafts a flow for you.
Start with one or two that fit your week rather than turning on everything at once. The featured multi-flow workflows are a good place to look: Company Brain, Competitor Intelligence, Ship Log, Daily Briefing, Inbox Autopilot, and Distraction Remover.
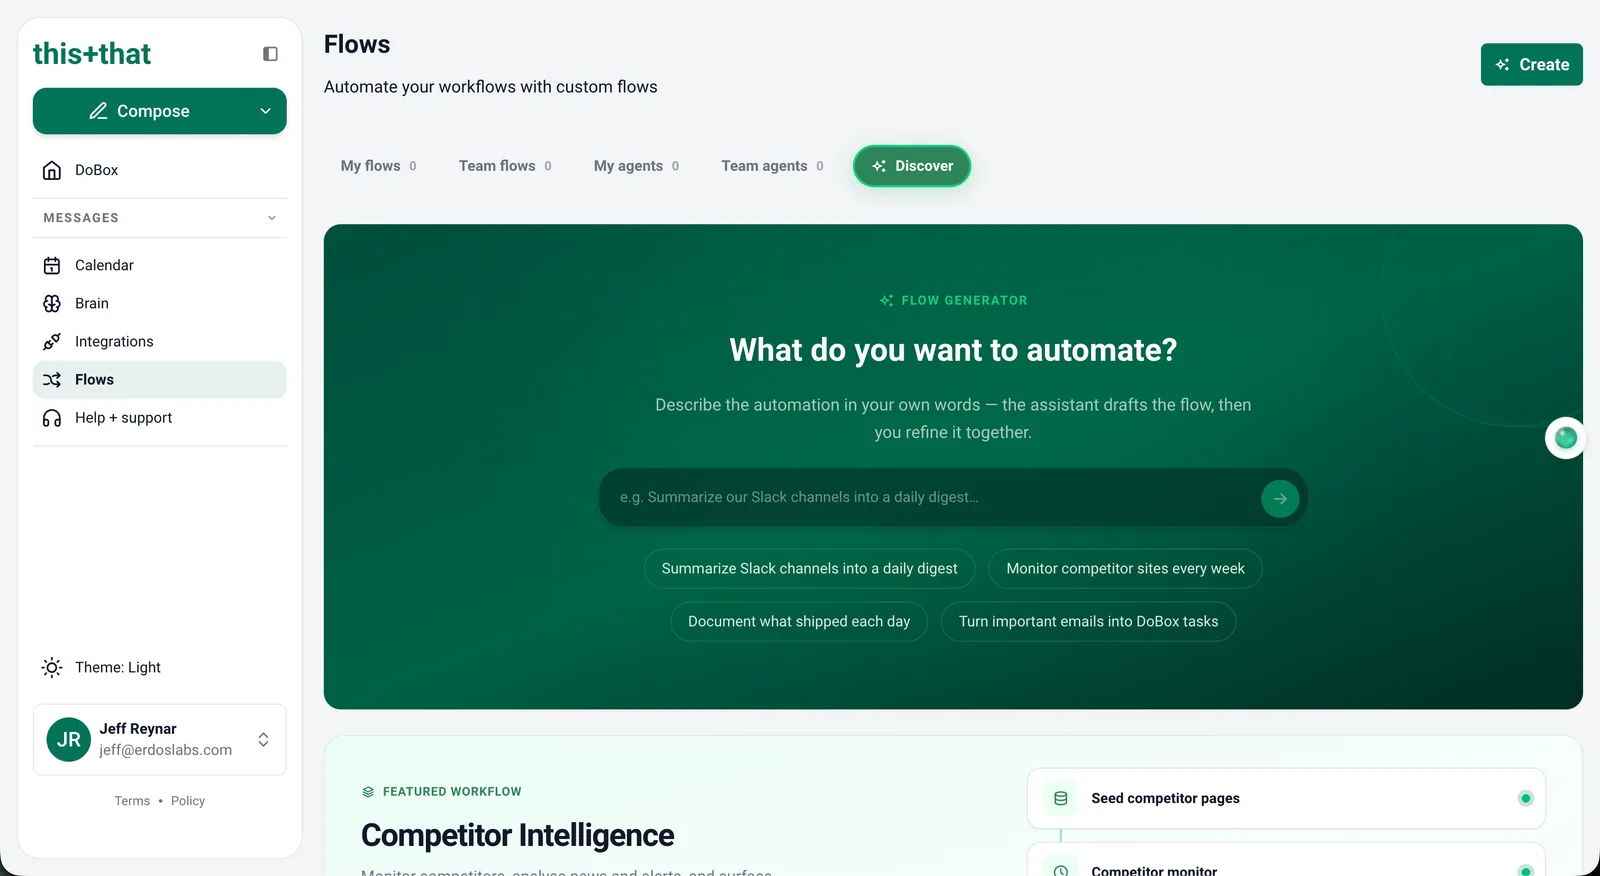 The Flows Discover tab. Describe what you want to automate in plain words, or pick from the prebuilt templates and workflows.
To add one, choose Use template (or Use workflow for the multi-flow ones). The Template Setup Wizard walks you through any settings it needs; step through it with Next and finish on Set it up. You will see a “Flow created successfully” toast, and the flow now appears under My flows, running against your connected channels.
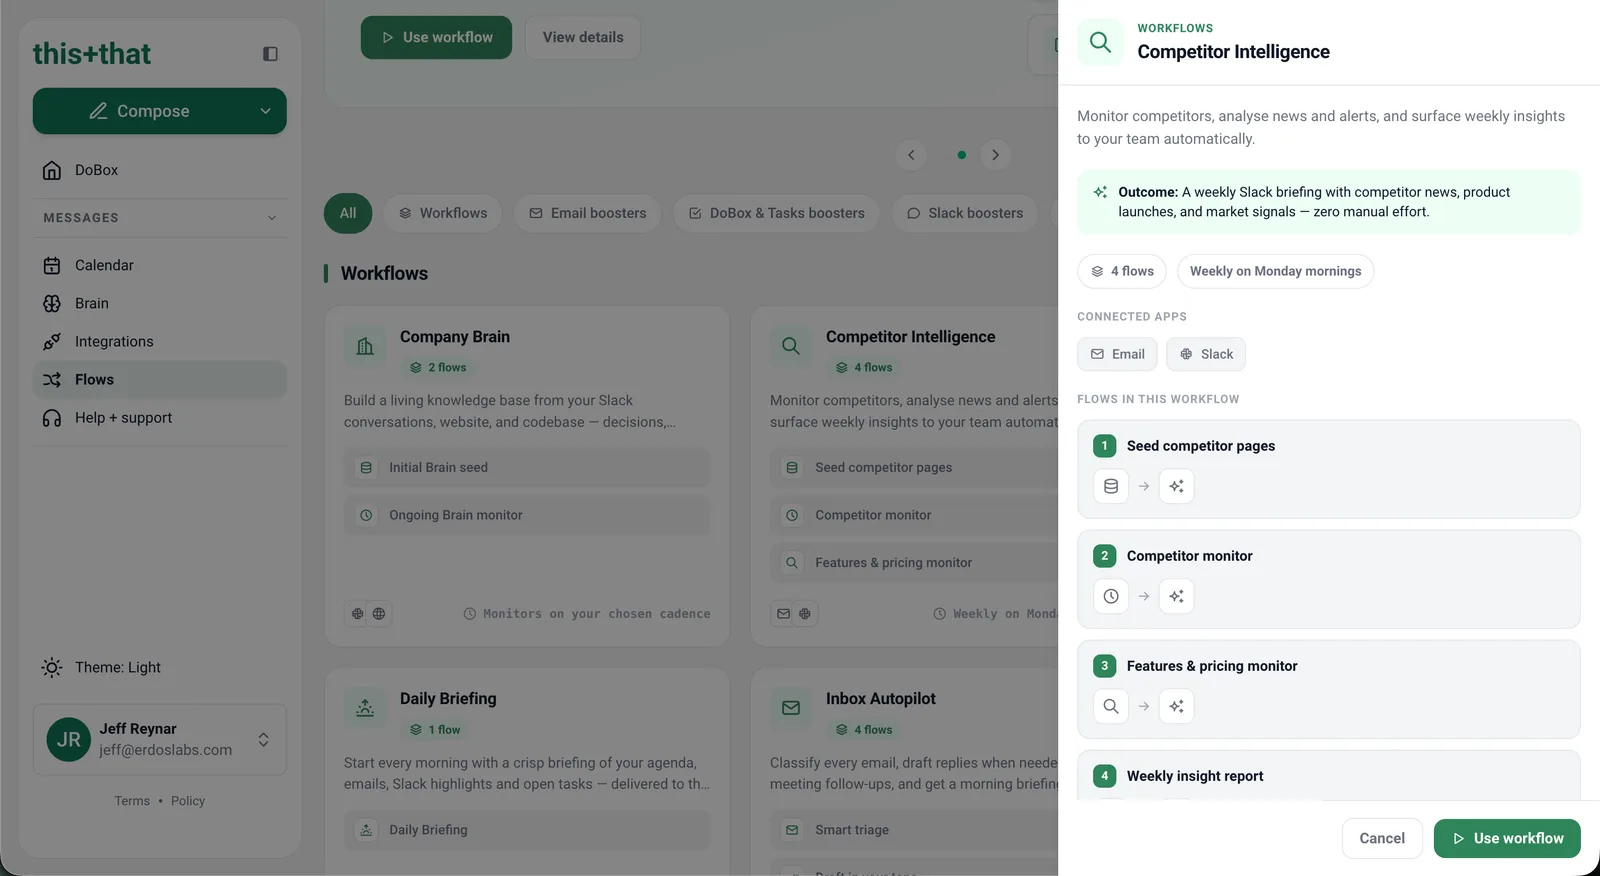 Opening a workflow shows what it does, the apps it uses, and the flows inside. “Use workflow” adds the whole set, then a short setup wizard collects anything it needs.
Go further (optional)
Once the basics are running, four things make this+that noticeably more useful:
- Add knowledge to your Brain. Open Brain in the sidebar and create a page for anything your flows should know: your standard replies, an FAQ, a policy, a price list. Grounded flows write better drafts.
- Connect MCP tools. In the MCP Connections section of the Integrations page, link outside tools like GitHub or Notion so your flows can act on them.
- Build your own workflow. When a template does not quite fit, the Create button on the Flows page lets you build one from scratch, either by describing it or in the visual editor.
- Message your assistant from your phone. On the Integrations page, find the Telegram assistant box and choose Connect. Telegram opens on a chat with the this+that bot; send the message it suggests to confirm the link, and the box shows as connected. From then on you can ask the bot what needs your attention, trigger a flow, or approve a draft reply without opening the app. This is a direct message between you and the bot. It is a way to reach this+that, separate from the channels it reads.
The Brain, MCP and workflow steps each have full instructions in the team section below, so borrow from there whenever you want more depth.
Set up this+that for your team
Setting up for a team is the personal setup plus a few shared pieces. The order matters: get yourself working first, decide what the team needs, prepare the shared knowledge and tools those flows depend on, build the team flows, and only then invite people in. Walking in before the shared pieces exist means teammates arrive to an empty product.
Step 1: Create your own account and go through onboarding
Do the individual setup above end to end. Create your account, finish onboarding, and connect your first email account. Everything that follows assumes you have your own working account to build and test in.
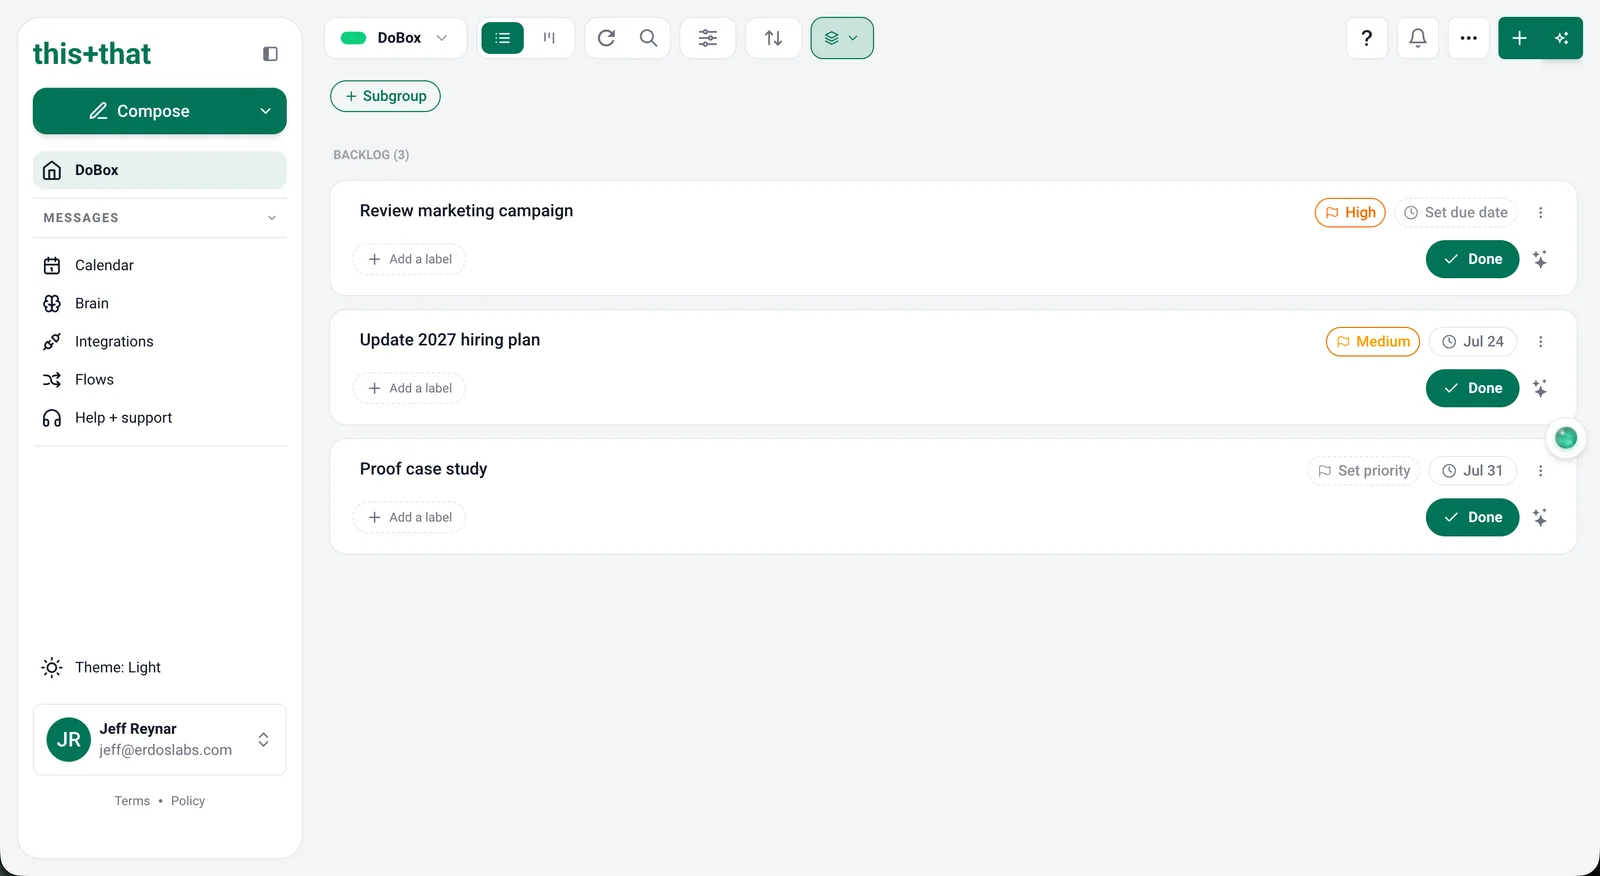 Your DoBox after setup: the messages this+that read, turned into a prioritized task list.
Step 2: Connect additional accounts
Back in Integrations, connect the rest of the channels your team relies on, the same way you did for your own email. A team lead usually reaches past the Setting up analysis channels into Team integrations, for the shared surfaces: the Slack bot, Instagram, Messenger, and GitHub.
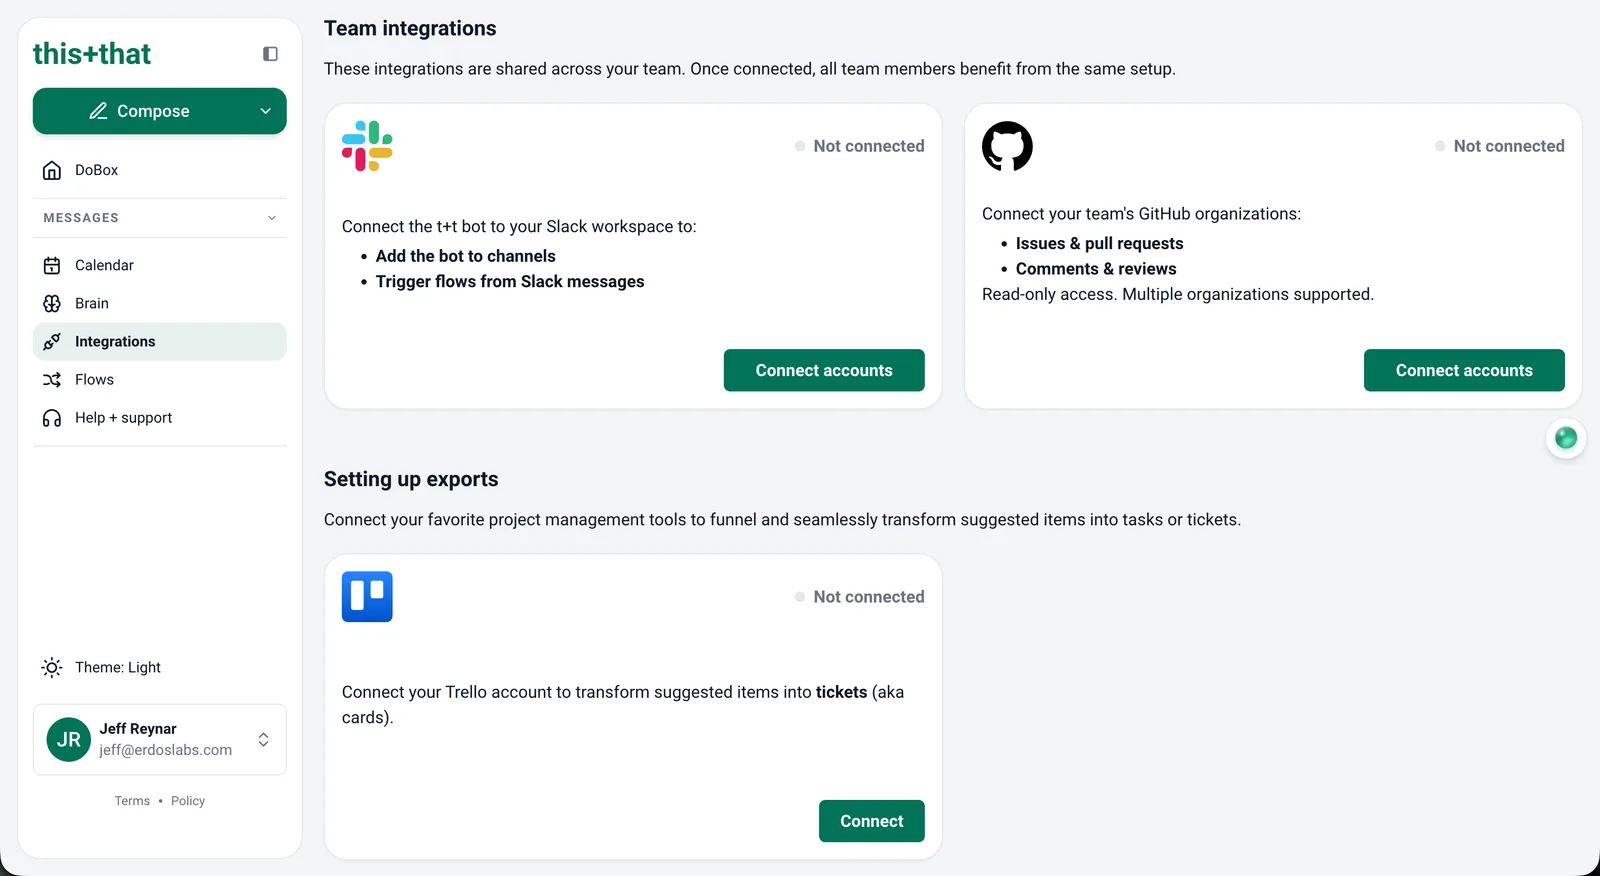 Further down the Integrations page: the shared “Team integrations.”
Step 3: Select workflows for yourself
Before you decide what to give the team, run some flows yourself. Go to Flows, open the Discover tab, and turn on a couple of templates the same way you did in the personal setup. Living with them for a few days tells you which ones are actually worth recommending.
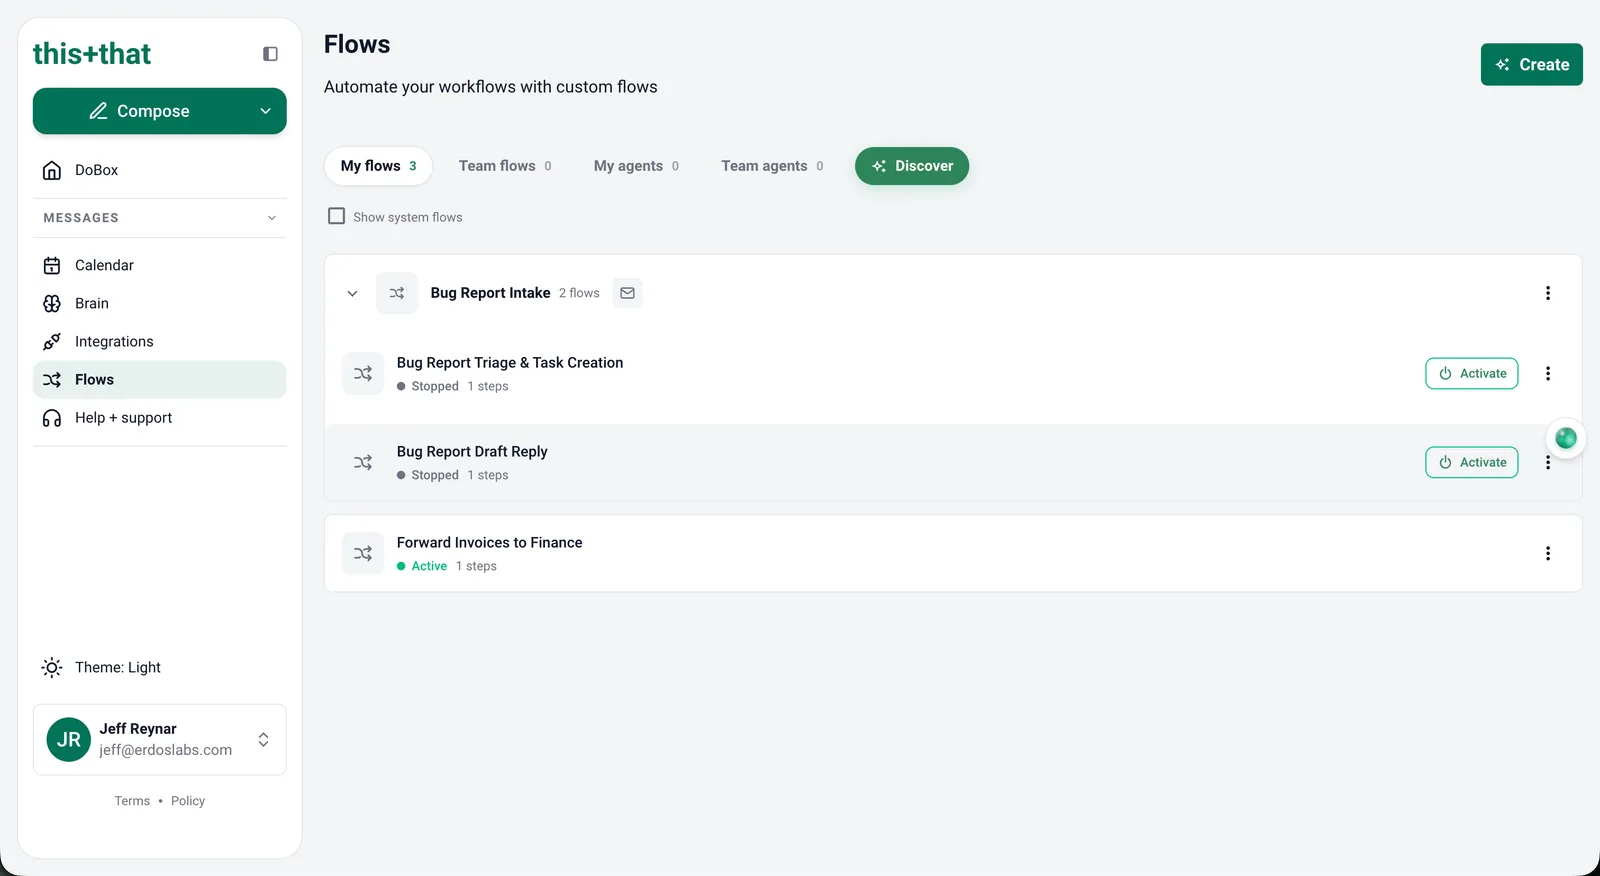 The flows you have added show up under “My flows,” where you can activate or pause each one.
Step 4: Identify workflows to recommend to teammates
Now decide what the team needs. Think in terms of roles: the update your sales people send, the triage your support people run, the daily summary your managers want. Browse the Discover gallery and the featured workflows again, this time with those roles in mind, and make a short list of the ones worth standardizing.
There is no button that recommends a flow to a specific person. You share with the team in one of two ways. On a flow, use the Make this a team flow toggle and pick a team with Select team (for agents, the label reads Share this agent with your team). Or, when you provision a template, choose the team in the Team picker inside the Template Setup Wizard. Teammates then find what you shared under the Team flows and Team agents tabs.
Step 5: Create the Brain content those workflows need
Team flows are only as good as what they know. A sales flow that sends quotes needs the price list. A support flow needs the policies. Build that shared knowledge before you build the flows that read it.
Open Brain in the sidebar. The left rail lists your knowledge spaces, split into System, Team, and User. Create a shared space with New space, name it, set the type to Team, and choose Create. Then add a document with Create page (or New page): give it a title, pick the required space, optionally set a parent page, and choose Create. The page is an editable document, so paste in the real content, your price list, your FAQ, your policies. Keep team-shared knowledge in a Team space so the flows and the people who need it can reach it.
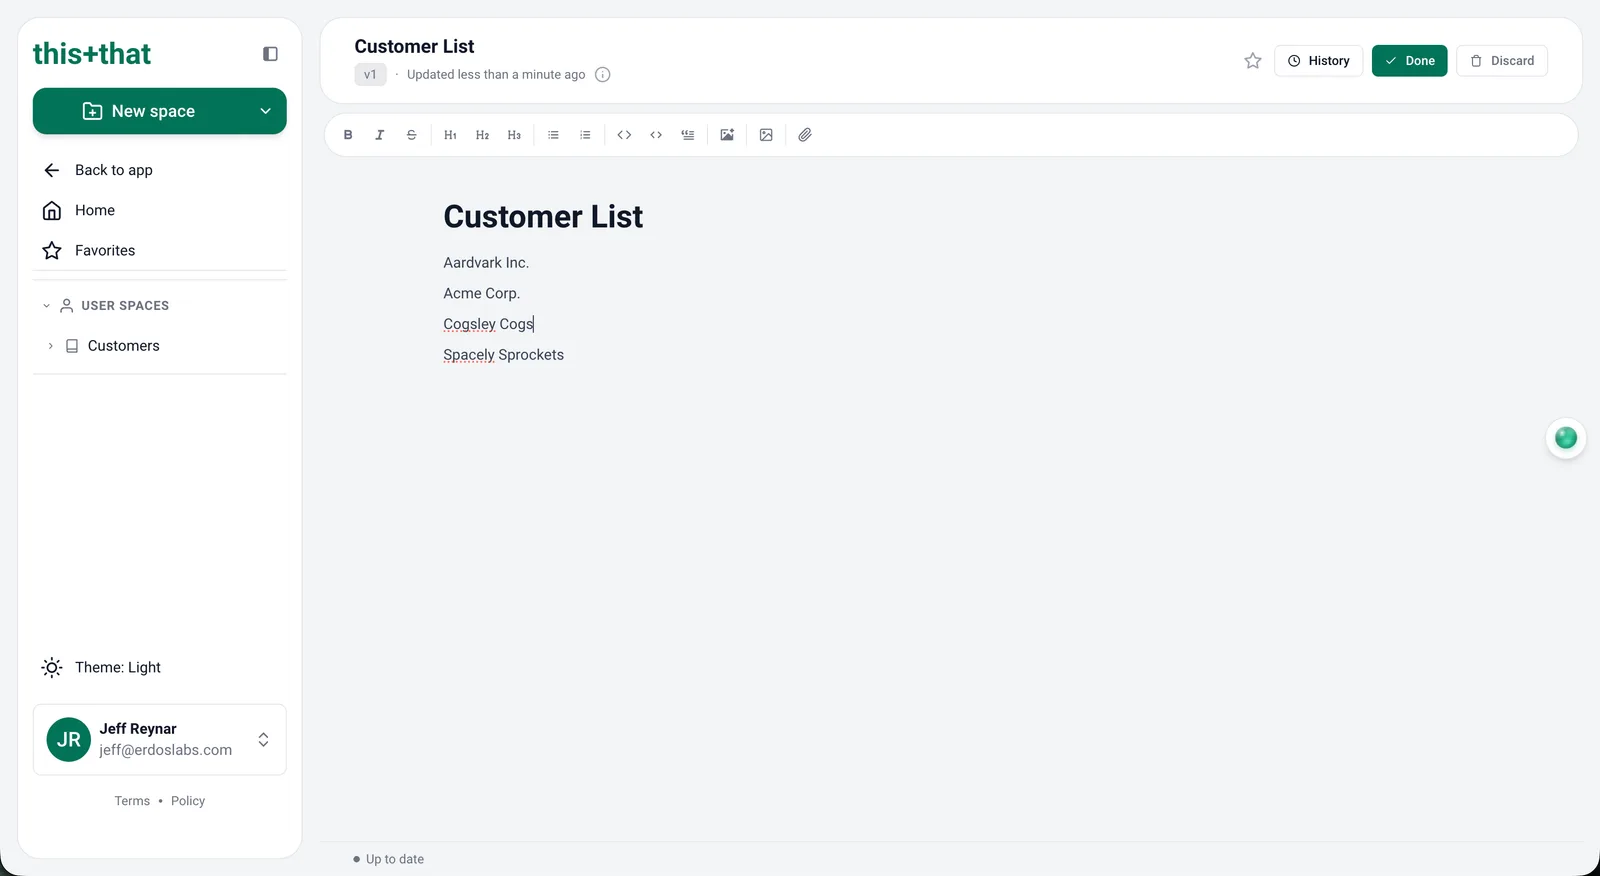 A Brain page is just an editable document. This one holds a customer list; a sales flow could read a price list the same way.
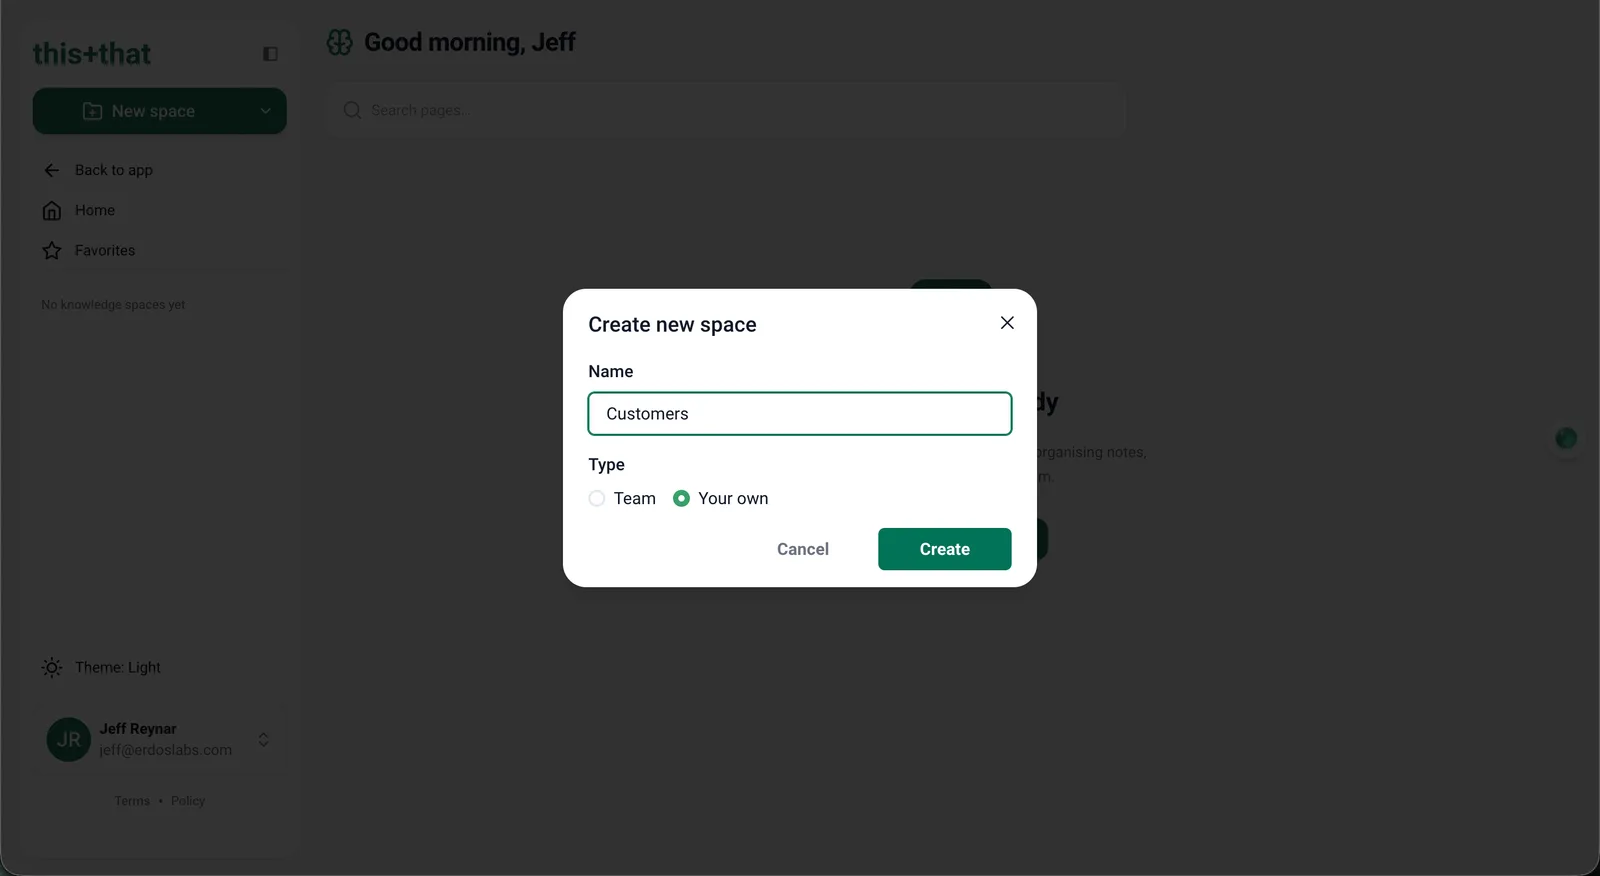 You make a space first (choose “Team” to share it, or “Your own”), then add pages like the one above inside it.
Step 6: Connect the MCP servers those workflows require
If your team flows need to act on outside tools, connect those tools now through MCP. Open the MCP Connections section on the Integrations page and choose Add Connection. In the Add MCP Connection panel, fill in the Connection Name, the Server URL, and the Authentication method (None, API Key, Bearer Token, or OAuth 2.0) with any credentials, then choose Add & Sync. this+that discovers the available tools, and you pick the Enabled Tools you want to make available in your flows.
For common services you can skip the manual setup. One-click official connections exist for GitHub, Notion, Dropbox, Box, Figma, HubSpot, Atlassian, and Monday.
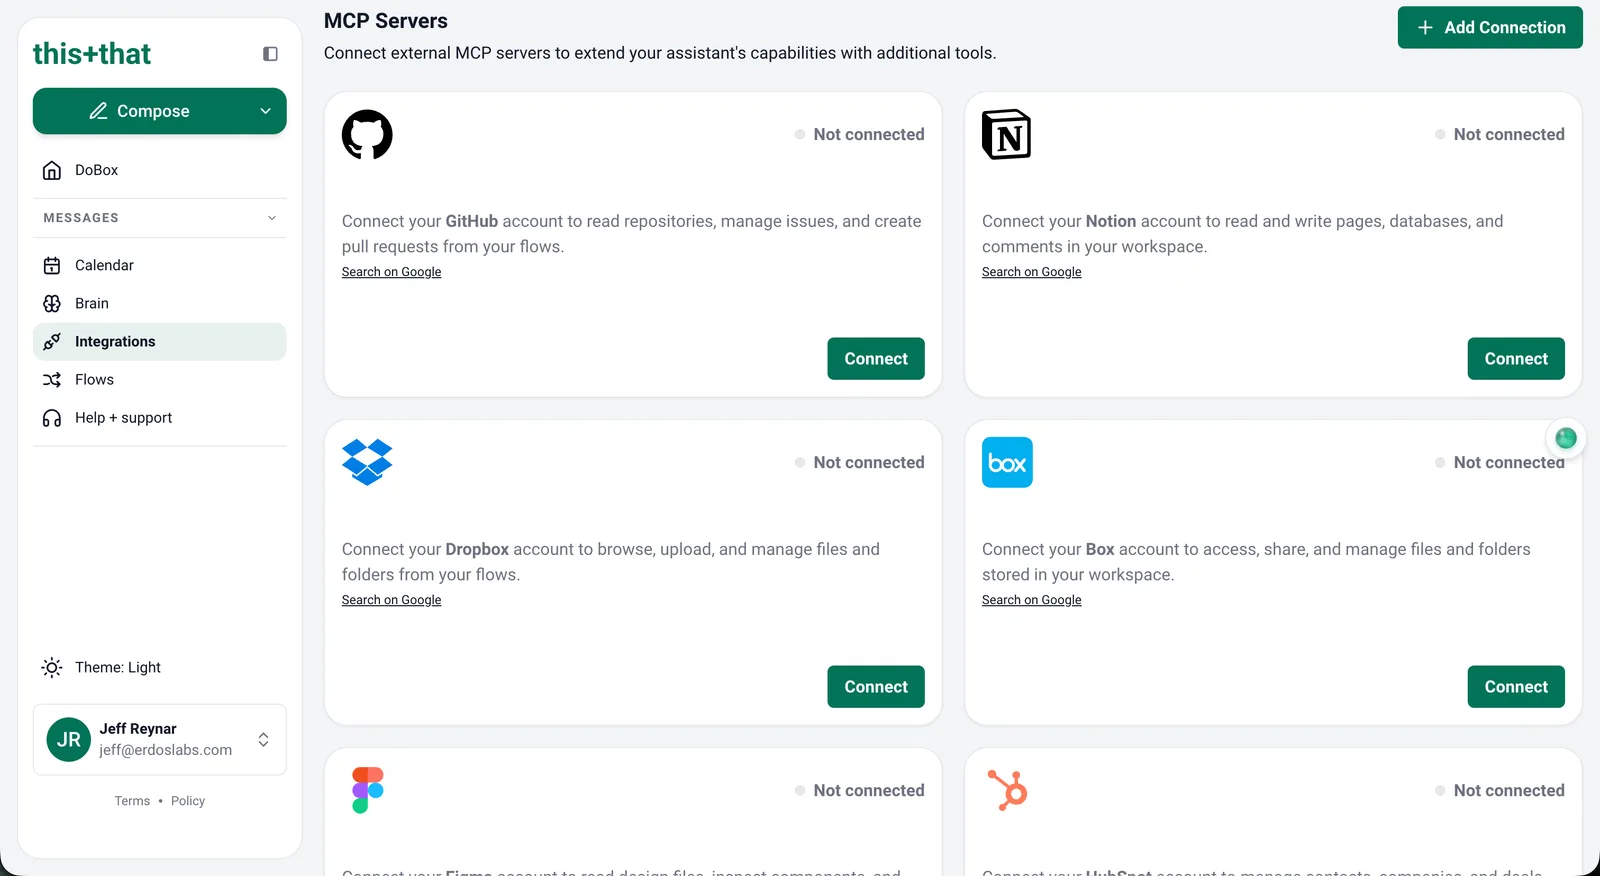 The “MCP Servers” section. Connect an official server like GitHub or Notion in one click, or use “Add Connection” for a custom one.
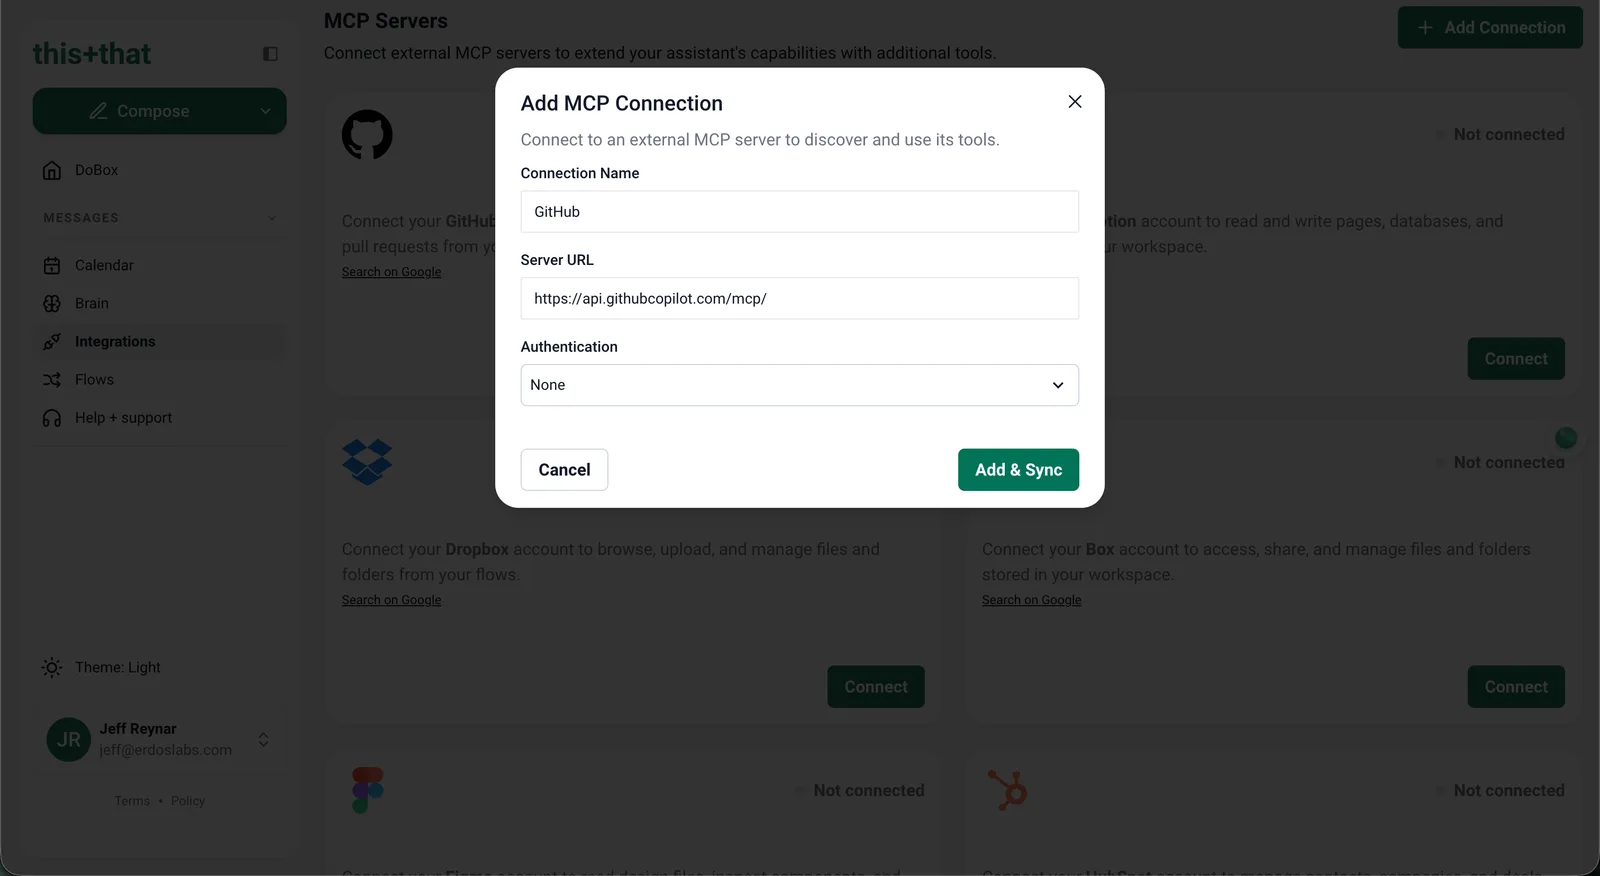 For a server that is not one of the one-click options, “Add Connection” opens this dialog: name it, paste the server URL, choose the auth type, and “Add & Sync.”
Step 7: Build those workflows
With the Brain content and MCP tools in place, build the flows your team will use. On the Flows page, choose Create. You have two ways to build:
- The conversational builder (“Create an automation”) lets you describe what you want in plain words and drafts it for you.
- The visual Flow Editor gives you full control. You begin by choosing a starter, which is the trigger: When I get an email, On a schedule, When I get a Slack message, When a tag is applied, or Run manually. A starter is required before you can save. Then add each step with Add step, choosing from actions like AI Ask, Decide, Summarize, Check if, Draft a reply, Add label, Send Slack message, RAG Search, and Generate DoBox.
When a role needs several flows that work together, group them as a Flow Group so they read from the same context and stay consistent. Point the flows that need shared knowledge at the Team space you built in Step 5.
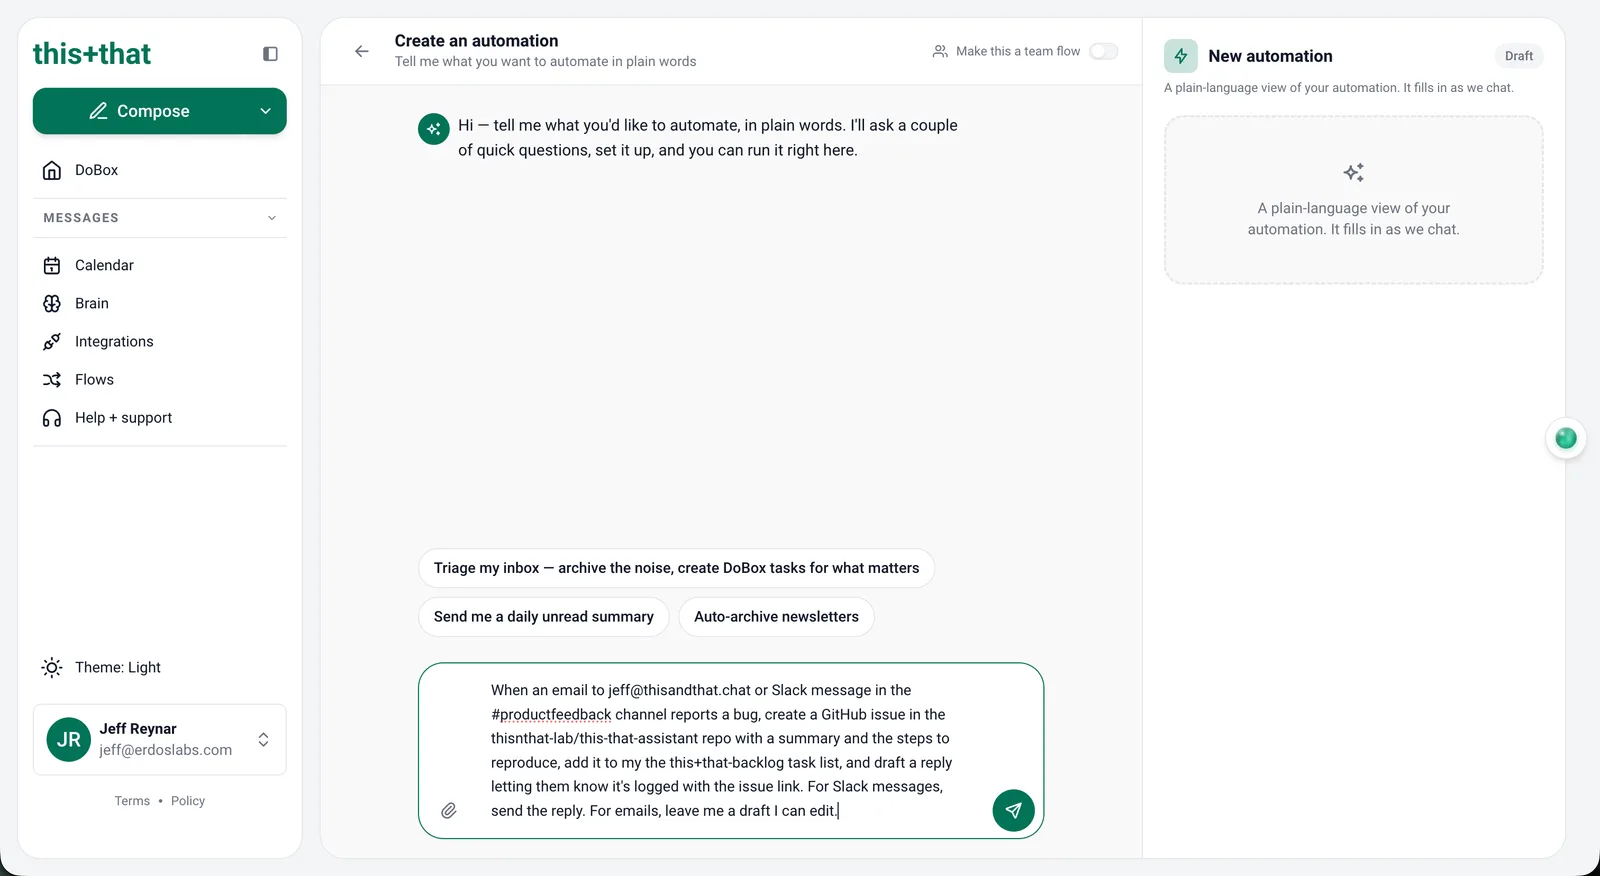 The build screen. Describe the automation in plain words; the assistant asks a few questions, sets it up, and lets you run it.
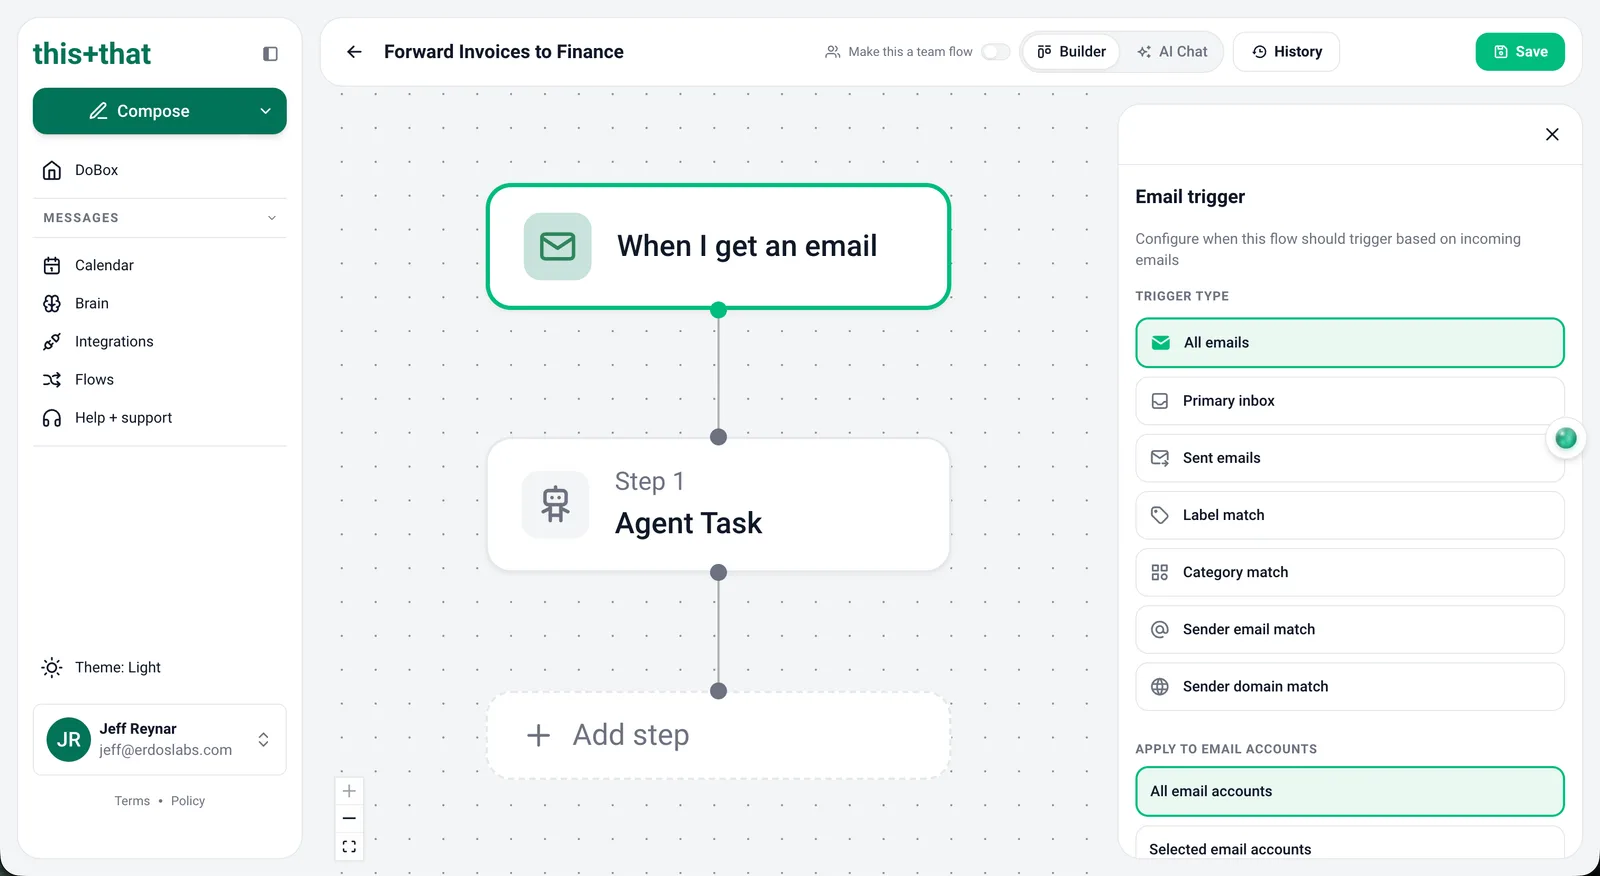 Or open the visual editor to build by hand: pick a starter (trigger) such as “When I get an email,” then “Add step” for each action.
Step 8: Invite your teammates
Everything is ready, so bring people in. Open the user menu and go to Team, the Team hub. Choose Create team first if you have not made one. Then choose Invite members to open the invite modal: enter each person’s Email address and Role (Admin or Member), use Add another to queue several at once, and choose Send invite. You will see “Invitations sent.” When your teammates accept, they land in onboarding with your shared team flows, team agents, and Brain spaces already waiting for them.
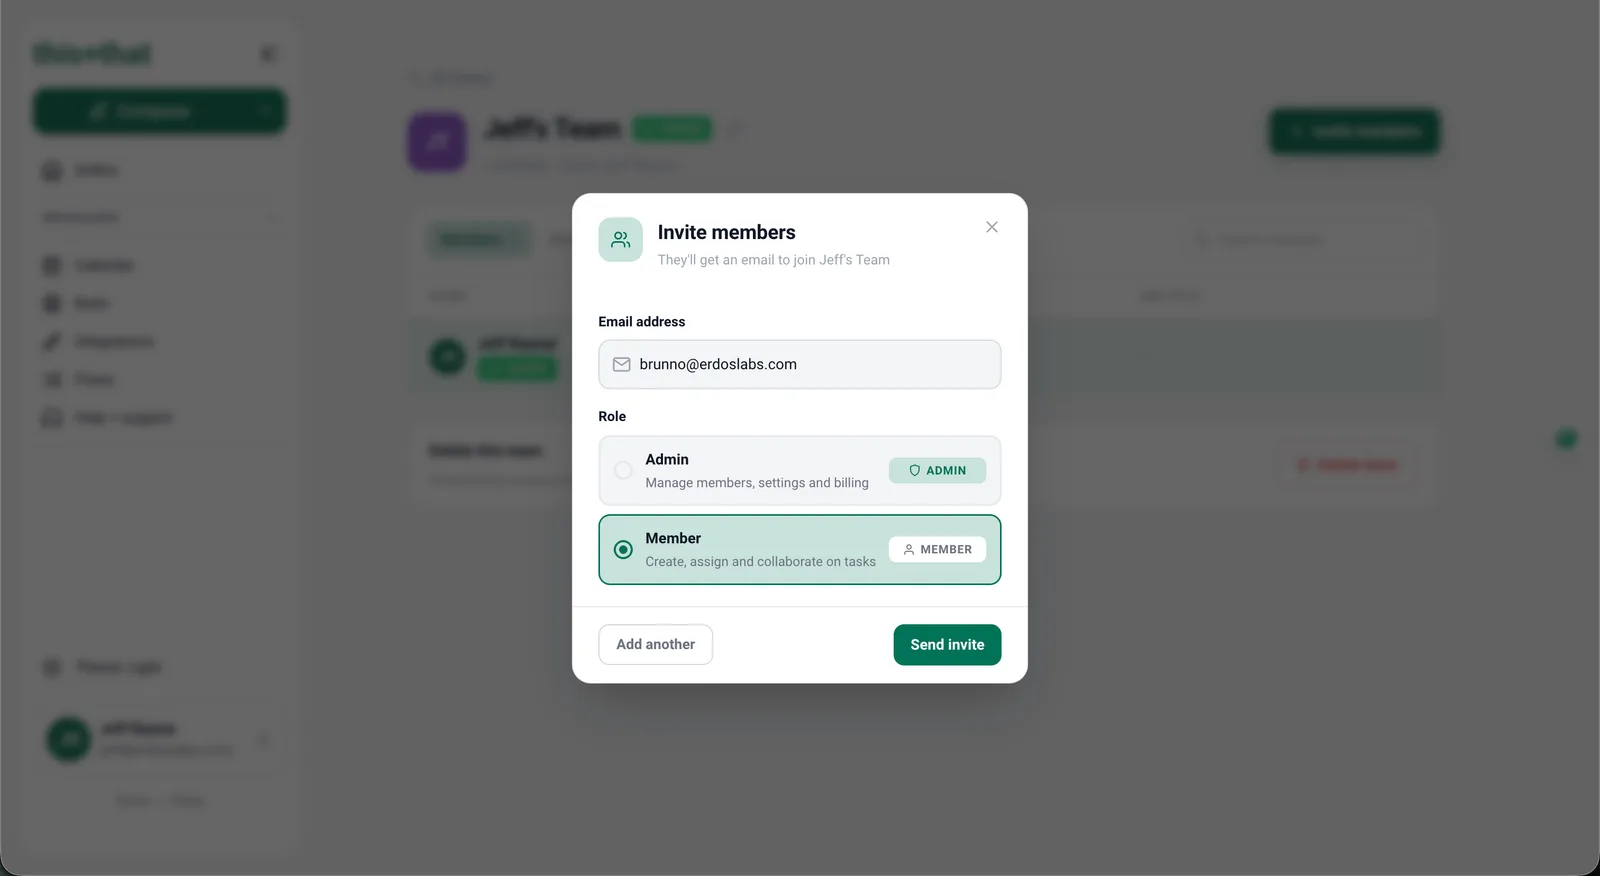 Invite teammates by email and set each one as an Admin or a Member. Use “Add another” to invite several at once.
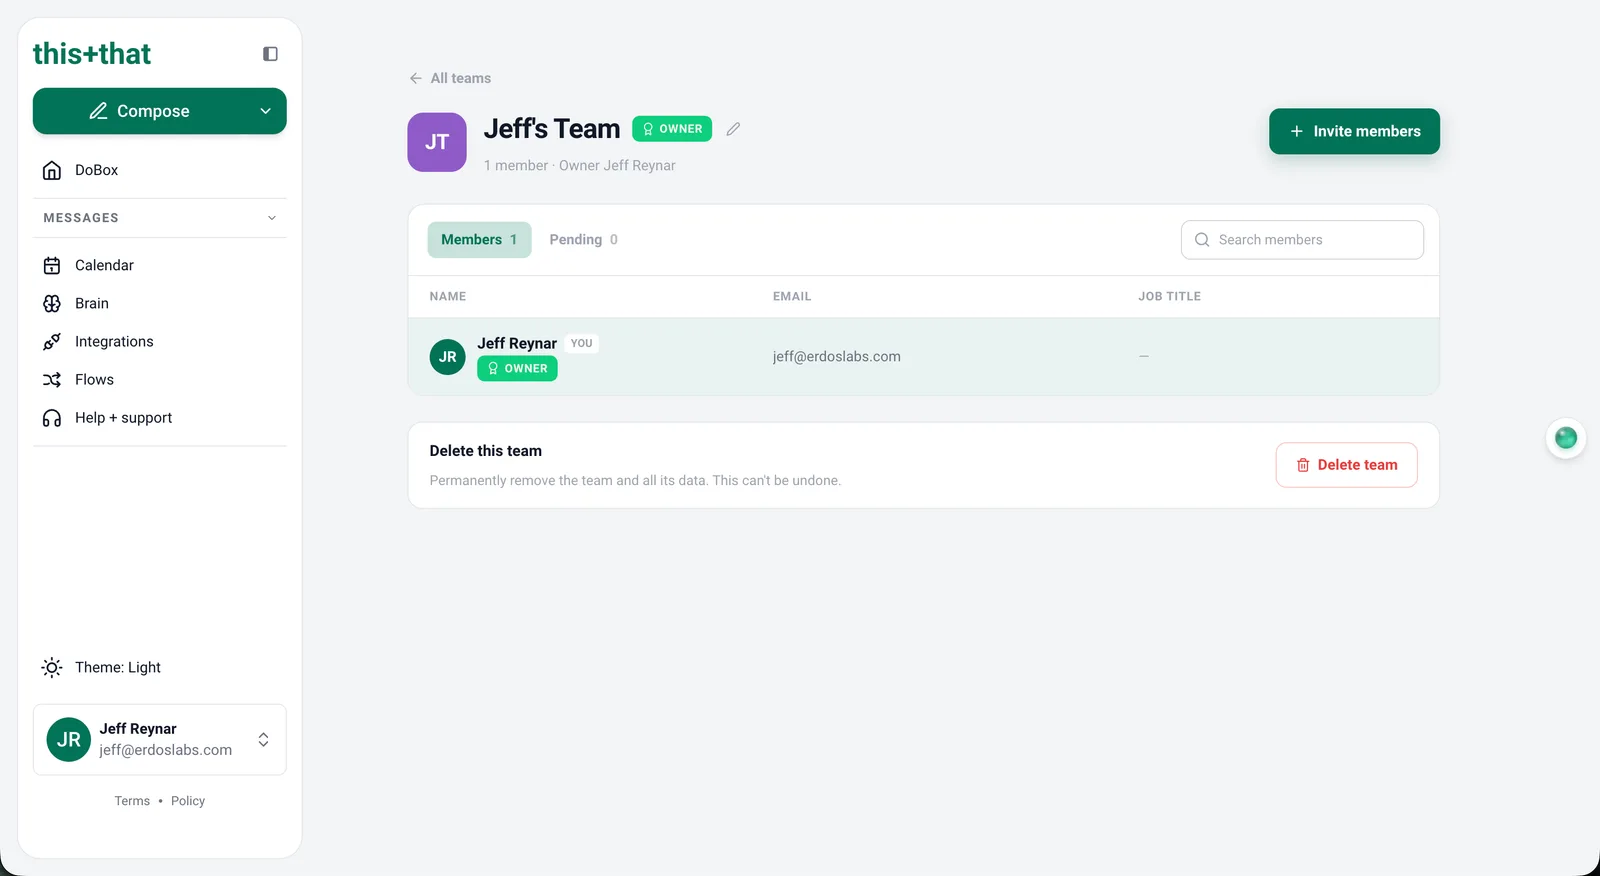 The Team hub is where you manage a team and see who has joined; “Invite members” opens the dialog above.
From here it runs on your real messages. Watch how it handles them over the first week, adjust the flows that need a lighter or heavier touch, and add the next batch once you trust the ones you have. Our guide to what to automate first walks through how to find the workflows worth building.